
Can you dry chicken for dog treats safely at home? Yes, you absolutely can! Drying chicken at home is a fantastic way to create healthy, delicious, and budget-friendly treats for your canine companion. This guide will walk you through the best homemade methods for making dehydrated chicken dog treats, covering everything from preparation to safe storage.
Making chicken jerky dog treats recipe style creations at home offers unparalleled control over ingredients, ensuring your furry friend receives only the best. You can skip the preservatives, artificial colors, and fillers often found in store-bought options. Plus, the satisfaction of creating something your dog adores is immense. This article will delve into the most effective ways to air dry chicken for dogs, oven bake chicken dog treats, and even touch upon the principles behind freeze dried chicken dog treats so you can achieve perfect homemade chicken dog chews.
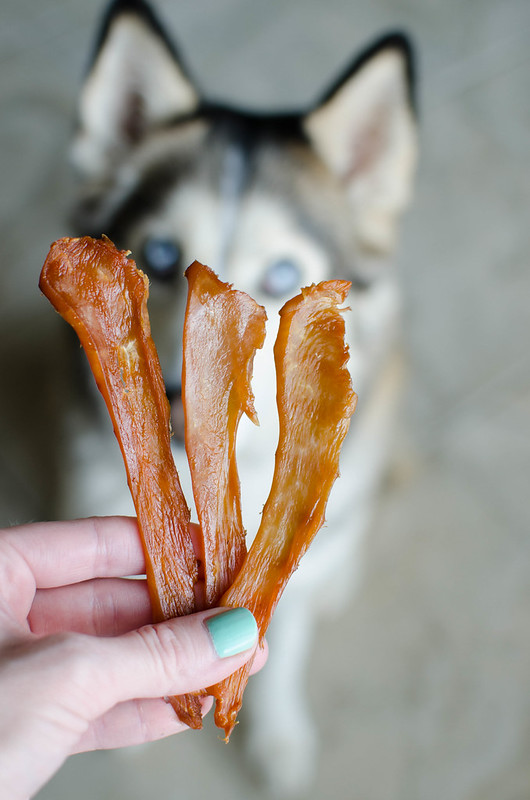
Image Source: farm8.staticflickr.com
Why Dry Chicken for Your Dog?
Drying chicken is a time-honored method of preservation that locks in flavor and nutrients while removing moisture. This process makes the treats shelf-stable and creates a satisfying chewy texture that dogs love. Here are some key benefits:
- Nutrient Retention: Drying at low temperatures helps preserve the protein and other essential nutrients in the chicken.
- Extended Shelf Life: Removing moisture inhibits bacterial growth, allowing the treats to last much longer than fresh chicken.
- Digestibility: For some dogs, dried chicken can be easier to digest than raw or cooked chicken.
- Dental Health: The chewy texture of dried chicken can help clean your dog’s teeth and gums, promoting better oral hygiene.
- Cost-Effective: Buying chicken in bulk and drying it yourself is significantly cheaper than purchasing commercial jerky treats.
- Control Over Ingredients: You know exactly what goes into your dog’s treats – no mystery ingredients or allergens.
Preparing Chicken for Drying: The Crucial First Steps
Before you even think about drying, proper preparation is paramount for safety and quality. This is where safe ways to dry chicken for dogs begin.
Choosing the Right Chicken
- Lean Cuts: Opt for lean cuts of chicken like chicken breast or tenderloins. These have less fat, which can go rancid over time and affect the shelf life of your treats.
- Quality Matters: Use fresh, high-quality chicken. Avoid chicken that has been pre-marinated, seasoned, or contains added solutions. Organic and free-range options are excellent choices if your budget allows.
- Avoid Bones: Never dry chicken bones. They can splinter and cause serious internal injuries to your dog.
Trimming Excess Fat and Skin
- Fat: Carefully trim away as much visible fat and skin as possible. Fat is the enemy of long-term preservation in homemade jerky. It can become rancid, leading to off-flavors and a shorter shelf life.
- Skin: While some dogs enjoy the chewiness of chicken skin, it contains a significant amount of fat. For optimal shelf life, it’s best to remove it.
Slicing the Chicken
The thickness of your chicken slices will directly impact the drying time. Aim for consistency to ensure even drying.
- Thickness: A thickness of about 1/8 to 1/4 inch is ideal. Thicker pieces will take longer to dry, and thinner pieces may become too brittle.
- Cutting Method:
- Partial Freezing: Partially freezing the chicken (about 1-2 hours) makes it much firmer and easier to slice thinly and evenly with a sharp knife.
- Meat Slicer: If you have a meat slicer, this is the easiest and most consistent way to achieve uniform slices.
- Mandoline Slicer: A mandoline slicer can also be used, but exercise extreme caution as they are very sharp.
- Grain of the Meat: Slice the chicken against the grain. This results in chewier, more enjoyable treats for your dog.
Best Homemade Methods for Drying Chicken
There are a few primary methods for drying chicken at home, each with its own advantages. We’ll explore the most popular and effective ones.
Method 1: Oven Baking (The Most Accessible Method)
This is often the easiest method as most people already have an oven. It’s a great way to start making chicken treats for dogs at home. The key here is low temperature chicken drying for pets.
What You’ll Need:
- Baking sheets
- Wire cooling racks (that fit inside the baking sheets)
- Sharp knife or meat slicer
- Paper towels
- Chicken breast or tenderloins
Step-by-Step Oven Drying:
- Preheat Oven: Set your oven to its lowest possible temperature. This is typically between 140°F and 170°F (60°C to 77°C). If your oven doesn’t go this low, you might need to prop the oven door open slightly with a wooden spoon to allow some heat to escape and maintain a lower temperature. Crucially, ensure your oven can maintain a temperature low enough to dry rather than cook the chicken.
- Prepare Baking Sheets: Line baking sheets with foil or parchment paper for easier cleanup. Place wire cooling racks on top of the lined baking sheets. The racks allow air to circulate around the chicken, promoting even drying and preventing the chicken from sticking to the pan.
- Arrange Chicken: Lay the thinly sliced chicken pieces on the wire racks in a single layer. Make sure the pieces are not touching each other to allow for proper air circulation.
- Drying Process: Place the baking sheets in the preheated oven.
- Drying Time: Drying time can vary significantly based on your oven’s temperature, the thickness of the chicken slices, and humidity levels. It can take anywhere from 4 to 12 hours.
- Rotation: For even drying, rotate the baking sheets every 1-2 hours. You can also flip the chicken pieces every few hours.
- Checking for Doneness: The chicken is ready when it is dry to the touch, leathery, and pliable, with no moist spots. It should bend without breaking easily. It should not be crispy or brittle.
- Cooling: Once dried, remove the chicken from the oven and let it cool completely on the wire racks. This is an important step before storing.
Tips for Oven Drying:
- Ventilation: If possible, slightly prop open your oven door with a heat-safe utensil (like a wooden spoon) to allow moisture to escape. This mimics the convection action of a dehydrator and speeds up the drying process.
- Check Frequently: Start checking the chicken after about 4 hours to gauge progress and prevent over-drying.
- Leftover Chicken: You can use cooked chicken too, but ensure it’s plain cooked chicken (no seasonings, oils, or sauces). However, raw chicken dried at low temperatures is generally preferred for texture and safety.
Method 2: Using a Food Dehydrator (The Optimal Method)
A food dehydrator is designed specifically for this purpose and offers the most consistent and efficient results. This method is excellent for achieving perfect dehydrated chicken dog treats.
What You’ll Need:
- Food dehydrator
- Sharp knife or meat slicer
- Chicken breast or tenderloins
Step-by-Step Dehydrator Drying:
- Prepare Chicken: Follow the same preparation steps as for oven drying: choose lean cuts, trim fat and skin, and slice thinly and evenly.
- Arrange on Trays: Place the chicken slices in a single layer on the dehydrator trays. Ensure no pieces are overlapping to allow for optimal airflow.
- Set Temperature: Set the dehydrator to a temperature between 145°F and 160°F (63°C and 71°C). This range is often recommended for drying meat products.
- Drying Process:
- Drying Time: Drying typically takes 6 to 10 hours, but can vary depending on the dehydrator model, thickness of the slices, and ambient humidity.
- Tray Rotation: Some dehydrator models recommend rotating trays every few hours for even drying. Check your dehydrator’s manual for specific instructions.
- Checking for Doneness: The chicken is ready when it’s leathery, pliable, and bends without breaking. It should have a dry surface.
- Cooling: Allow the chicken treats to cool completely on the trays or on a wire rack before storing.
Benefits of Using a Dehydrator:
- Consistent Temperature: Dehydrators maintain a steady, low temperature, ensuring even drying without cooking the chicken.
- Energy Efficient: They are generally more energy-efficient than using an oven for extended periods.
- Airflow: Designed for optimal airflow, leading to faster and more uniform drying.
Method 3: Air Drying (Requires Specific Conditions)
Air dry chicken for dogs is possible, but it requires very specific environmental conditions. This method is less common for home users due to the risk of bacterial contamination if not done correctly. It’s best suited for dry climates with low humidity and good air circulation.
What You’ll Need:
- Fine mesh screens or dehydrator trays
- Sharp knife or meat slicer
- Chicken breast or tenderloins
- Fan (optional, for air circulation)
- Cheesecloth or fine mesh netting
Step-by-Step Air Drying:
- Prepare Chicken: Follow the same preparation steps: trim fat, slice thinly and evenly.
- Arrange: Place chicken slices in a single layer on fine mesh screens or dehydrator trays. Ensure good spacing.
- Environment:
- Location: Choose a warm, dry, and well-ventilated location, ideally outdoors if the climate is suitable and protected from pests. Indoors, a dry, sunny spot with good air circulation can work.
- Temperature & Humidity: Ideal conditions are warm temperatures (above 70°F / 21°C) and low humidity (below 50%).
- Pest Protection: Cover the chicken with cheesecloth or fine mesh netting to protect it from insects and dust.
- Drying Process:
- Time: Air drying can take several days, depending on the conditions.
- Monitoring: Check the chicken regularly for dryness and signs of spoilage. If you notice any mold or off-odors, discard the batch immediately.
- Turning: Turn the chicken pieces daily for even drying.
- Cooling: Once thoroughly dry and pliable, let them cool completely before storage.
Considerations for Air Drying:
- Risk of Spoilage: This method carries the highest risk of bacterial growth and spoilage if conditions are not optimal. It’s generally not recommended unless you have experience and a controlled environment.
- Pest Control: Protecting the drying chicken from flies, ants, and other pests is crucial.
What About Freeze-Dried Chicken Dog Treats?
While achieving true freeze dried chicken dog treats at home is not feasible without specialized, expensive equipment (freeze dryers), understanding the process highlights the benefits of moisture removal. Freeze-drying removes moisture at very low temperatures and pressures, preserving nutrients and creating a very lightweight, airy texture. Commercial freeze-dried treats offer an excellent option for dogs who prefer a more brittle treat or for owners seeking the absolute highest nutrient retention. For homemade convenience, dehydration (oven or dehydrator) is the practical choice.
Checking for Doneness: The Leathery Test
Regardless of the method used, the key to perfect homemade chicken dog chews is to achieve the right level of dryness. You’re not looking for crunchy chips, but rather pliable, leathery strips.
- The Bend Test: Take a piece of chicken. It should bend without snapping. If it snaps, it’s over-dried and may be too brittle for some dogs. If it’s still soft, pliable, or moist in the center, it needs more drying time.
- No Moisture: The surface should feel dry to the touch, with no greasy or oily residue.
- Cooling is Key: Remember that chicken will firm up as it cools.
Storage: Keeping Your Treats Fresh and Safe
Proper storing dried chicken dog treats is just as important as the drying process itself to ensure they remain safe and appealing for your dog.
Cooling Before Storage
- Crucial Step: Always allow the dried chicken treats to cool completely to room temperature before storing them. If you store them while warm, condensation can form inside the container, leading to mold growth.
Storage Containers
- Airtight Containers: Use airtight containers, such as glass jars with tight-fitting lids, resealable plastic bags (heavy-duty freezer bags work well), or vacuum-sealed bags.
- Preventing Moisture: The goal is to prevent any moisture from getting into the treats.
Storage Locations
- Room Temperature: Properly dried and stored treats can typically be kept at room temperature for 1-2 weeks.
- Refrigeration: For longer shelf life (up to 1-2 months), store the treats in the refrigerator. This is highly recommended, especially if you live in a humid climate or are unsure about the complete dryness of the treats.
- Freezer: For the longest shelf life (up to 6 months or more), store the treats in the freezer. This is the best option for larger batches.
Checking for Spoilage
Even with proper storage, it’s important to inspect the treats periodically.
- Visual Inspection: Look for any signs of mold, discoloration, or changes in texture.
- Smell Test: If the treats have developed any off-odors (rancid, sour, or moldy smells), discard them immediately.
Safety Considerations: What to Avoid
Safe ways to dry chicken for dogs means avoiding common pitfalls that can compromise the health of your pet.
- Never Use Seasonings or Marinades: Do not add salt, spices, garlic, onions, or any other seasonings to the chicken before drying. Many common seasonings are toxic to dogs (especially garlic and onions). Stick to plain chicken.
- Low and Slow Drying: High heat will cook the chicken, not dry it. Cooking the chicken through is safe for consumption, but it won’t preserve it effectively for jerky-style treats and can alter its texture and nutrient profile. Always aim for low temperature chicken drying for pets.
- Avoid Over-Drying: While you want them dry, over-drying can make them brittle and difficult for some dogs to chew, potentially posing a choking hazard. The leathery texture is ideal.
- Fat Content: As mentioned, excess fat can go rancid. Be diligent about trimming it.
- Cross-Contamination: Always practice good hygiene. Wash your hands, cutting boards, knives, and all equipment thoroughly before and after preparing the chicken.
How To Dry Chicken For Dog Treats: A Quick Summary Table
| Method | Equipment Required | Ideal Temperature | Drying Time (approx.) | Best For |
|---|---|---|---|---|
| Oven Baking | Oven, Baking Sheets, Wire Racks | 140°F – 170°F (60°C – 77°C) | 4-12 hours | Accessibility (most homes have ovens) |
| Food Dehydrator | Food Dehydrator | 145°F – 160°F (63°C – 71°C) | 6-10 hours | Consistency, efficiency, optimal results |
| Air Drying | Screens/Trays, Fine Mesh Netting, Fan (opt.) | Warm & Dry (low humidity) | Several Days | Specific climates, experienced users, high risk |
Frequently Asked Questions (FAQ)
Q1: Can I use chicken thighs or other parts of the chicken?
A1: While you can use other parts, chicken breast or tenderloins are preferred because they are leaner. Thighs and skin contain more fat, which can spoil faster and reduce the shelf life of your dried treats. If you do use fattier cuts, be extra diligent about trimming all visible fat and skin.
Q2: How long do homemade chicken dog treats last?
A2: Properly dried and stored in an airtight container, they can last 1-2 weeks at room temperature, 1-2 months in the refrigerator, and 6+ months in the freezer. Always check for signs of spoilage before giving them to your dog.
Q3: My chicken treats are too hard. What did I do wrong?
A3: This usually means they were over-dried. For the next batch, try drying them for a shorter period or at a slightly lower temperature. Aim for a leathery, pliable texture rather than a brittle one.
Q4: Can I season the chicken treats for my dog?
A4: It’s strongly recommended NOT to add any seasonings, salt, or marinades. Many common spices are harmful or toxic to dogs. Stick to plain, unseasoned chicken to ensure safety.
Q5: Is it safe to use cooked chicken to make treats?
A5: You can use plain cooked chicken, but it’s often easier and yields a better texture to dry raw chicken. If using cooked chicken, ensure it was cooked without any seasonings or oils. The drying process for cooked chicken might be faster as some moisture has already been removed. However, drying raw meat at low temperatures is considered a safer method for preserving the jerky-like texture and ensuring complete dehydration for shelf stability.
Q6: What is the difference between dehydrated and dried chicken treats?
A6: In the context of homemade treats, “dehydrated” and “dried” are often used interchangeably. Dehydration is the process of removing moisture. For dog treats, this is typically done using a food dehydrator or a low-temperature oven.
By following these guidelines, you can confidently create delicious and safe dehydrated chicken dog treats that your dog will absolutely love. Enjoy the process of making chicken treats for dogs and the happy wagging tails that follow!